
Welcome to the ReliOn Prime Glucose Meter Manual. This guide provides comprehensive instructions for setup, usage, and maintenance, ensuring effective blood glucose monitoring and better diabetes management.
Overview of the ReliOn Prime Glucose Meter
The ReliOn Prime Glucose Meter is a convenient and essential tool for managing diabetes. Designed for accuracy and ease of use, it offers a compact design and portability. The meter requires a small blood sample and provides quick, reliable results. It is part of a complete blood glucose monitoring kit, which includes test strips, a lancing device, lancets, and a user manual. The ReliOn Prime is known for its affordability and is widely available, including at major retailers like Walmart. Its user-friendly interface and clear digital display make it accessible for individuals of all skill levels. The meter also features a memory function to track previous readings, aiding in long-term glucose management. The manual is provided in both English and Spanish, ensuring accessibility for a broader audience.
Importance of Reading the User Manual
Reading the ReliOn Prime Glucose Meter Manual is crucial for proper use and accurate blood glucose monitoring. It provides detailed instructions for setup, test strip insertion, and result interpretation. Understanding the manual ensures correct operation, avoiding errors that could lead to inaccurate readings. The guide also covers maintenance tips, such as cleaning and battery replacement, to extend the meter’s lifespan. Additionally, the manual explains how to resolve common issues and interpret error messages. Available in both English and Spanish, it caters to a diverse audience. Failure to follow the manual’s instructions may result in incorrect readings or improper device care, which could compromise diabetes management. Always consult the manual to ensure optimal use and reliable results for better health outcomes.
Key Features of the ReliOn Prime Glucose Meter
The ReliOn Prime Glucose Meter offers a range of user-friendly features designed for accurate and efficient blood glucose monitoring. It provides quick results with a small blood sample requirement, making testing less painful. The meter has a memory recall function, storing up to 250 test results for easy tracking of glucose levels over time; It also supports syncing with Glooko, allowing users to manage their data digitally. The meter is compact and portable, making it ideal for on-the-go use. Additionally, it offers both 12-hour and 24-hour time formats, catering to different user preferences. The clear digital display ensures easy readability, and the inclusion of a comprehensive user manual in English and Spanish enhances accessibility. These features combine to provide a reliable and convenient solution for diabetes management.
Setting Up the Meter
Setting up the ReliOn Prime Meter involves inserting the battery, setting the time and date, and choosing between 12-hour or 24-hour format for accurate glucose tracking.
Meter Setup and Initialization
Setting up the ReliOn Prime Meter is straightforward. Insert the CR2032 battery, ensuring it is securely placed to power the device. Before first use, read the manual thoroughly and practice testing under healthcare guidance. The meter enters demo mode upon startup, allowing you to familiarize yourself with its features. Insert a test strip to initiate the meter, ensuring it is correctly aligned for proper function. Perform a control test using ReliOn Prime Control Solutions to verify accuracy. Follow the manual’s instructions for initializing the meter and preparing it for blood glucose testing. Proper setup ensures reliable results and effective diabetes management. Always refer to the user manual for detailed steps and consult a healthcare provider if unsure.
Setting the Time and Date
Setting the time and date on your ReliOn Prime Meter is essential for accurate record-keeping. Choose between a 12-hour format (e.g., 1:00 PM) or a 24-hour format (e.g., 13:00). The date format is MM/DD/YYYY. Use the navigation buttons to adjust these settings. Ensure the time and date are correct to avoid synchronization issues with platforms like Glooko. Once set, the meter retains these settings even when powered off. Refer to the user manual for step-by-step instructions. Proper time and date configuration ensures your blood glucose readings are logged accurately. This feature helps in maintaining a clear and organized history of your test results for better diabetes management and healthcare provider consultations. Always verify the settings before performing a test for reliable data tracking.
Choosing Between 12-Hour and 24-Hour Format
The ReliOn Prime Meter offers two time formats: 12-hour (with AM/PM) and 24-hour (military time). Select the format that aligns with your personal preference or regional standards. For the 12-hour format, times are displayed with AM or PM indicators (e.g., 3:00 PM). The 24-hour format uses a continuous cycle from 00:00 to 23:59, ideal for those accustomed to military time. To change the format, navigate to the time settings menu using the meter’s navigation buttons. Once selected, the format will apply to all logged readings. Ensure consistency in your choice to avoid confusion when reviewing historical data or syncing with external devices like Glooko. Proper time format selection is crucial for accurate and organized blood glucose tracking. This feature enhances user experience by catering to individual preferences while maintaining precise monitoring capabilities. Always confirm your selection before saving to prevent any discrepancies in recorded data.
Understanding the Date Format
The ReliOn Prime Meter uses the MM/DD/YYYY date format, ensuring clarity and consistency in recording blood glucose readings. This format displays the month first, followed by the day, and then the year (e.g., 07/25/2024); Properly setting the date is essential for accurate record-keeping and syncing data with platforms like Glooko. The date format cannot be altered, so users must ensure it matches their regional standards or personal preference during initial setup. Accurate date settings are vital for maintaining precise health records and analyzing trends over time. Always confirm the date format aligns with your needs to avoid discrepancies in stored data. This feature ensures seamless integration with other diabetes management tools, promoting better health outcomes.

Using the ReliOn Prime Glucose Meter
Using the ReliOn Prime Meter is straightforward and efficient, ensuring accurate blood glucose monitoring. Insert a test strip, apply a small blood sample, and receive results quickly for better diabetes management.
Step-by-Step Guide to Testing Blood Glucose
Ensure the meter is turned on and ready for use.
Insert a ReliOn Prime test strip into the meter, following the instructions provided.
Wash your hands thoroughly and use the lancing device to obtain a small blood sample.
Gently apply the blood drop to the test strip, ensuring proper contact for accurate results.
Wait for the meter to display your blood glucose reading.
Interpret the result, taking action if necessary based on your healthcare provider’s guidance.
This process ensures reliable and efficient blood glucose monitoring, helping you manage your diabetes effectively.
Inserting the Test Strip
Ensure the meter is turned on and ready for testing.
Locate the test strip port on the meter.
Take a ReliOn Prime test strip and handle it by the edges to avoid contamination.
Align the strip with the port, ensuring the gold side faces downward.
Gently push the strip into the port until it clicks securely into place.
The meter will automatically recognize the strip and prepare for testing.
If the strip is not inserted correctly, the meter may display an error message. Always use ReliOn Prime test strips for accurate results. Proper insertion ensures reliable blood glucose readings. If issues persist, consult the user manual or contact customer support for assistance.
Applying the Blood Sample
Once the test strip is correctly inserted, perform a fingerstick using the provided lancing device to obtain a small blood sample.
Gently touch the blood drop to the test strip’s sample area, ensuring it makes contact with the designated window.
The meter will automatically draw in the blood sample and begin processing.
Avoid adding more blood once the sample is applied, as this can cause inaccurate results.
The meter will display a “tick” or progress indicator while measuring your blood glucose levels.
After a few seconds, your results will appear on the screen.
For best accuracy, use a new test strip for each test and ensure the sample is applied correctly. If the sample is insufficient, repeat the process with a new strip. Always keep the meter on a flat surface during testing for reliable results.
Reading and Interpreting the Results
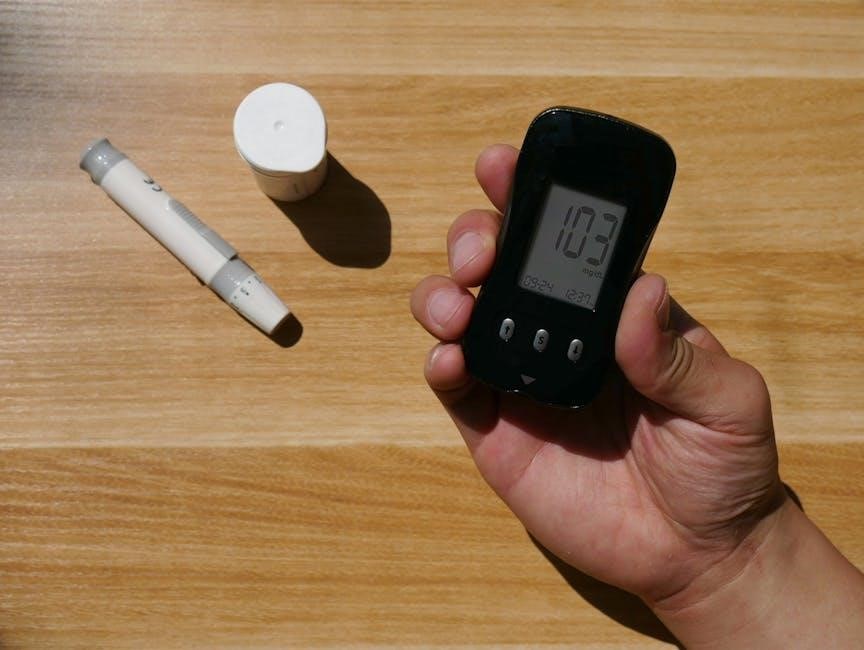
After applying the blood sample, the ReliOn Prime Glucose Meter will display your blood glucose reading in either mg/dL or mmol/L, depending on your settings. The result will appear on the screen within seconds. If your reading is within your target range, no action is needed. If it is high or low, consult your healthcare provider for guidance. The meter also stores recent readings, allowing you to track trends over time. If the meter displays “LO,” it indicates a reading below the detectable range. Always refer to the user manual for guidance on understanding error messages. Regular monitoring and accurate interpretation of results are crucial for effective diabetes management. This feature helps you make informed decisions about your health. Always keep track of your readings for better insights.

Maintenance and Care
Regular maintenance ensures optimal performance of your ReliOn Prime Glucose Meter. Clean the meter with a soft cloth and avoid harsh chemicals. Store the meter in a cool, dry place, away from direct sunlight. Replace the battery when the low-battery indicator appears to maintain accuracy. Proper care extends the life of your device and ensures reliable results.
Cleaning the Meter
Cleaning the ReliOn Prime Glucose Meter is essential for maintaining its accuracy and longevity. Use a soft, dry cloth to wipe the exterior gently, removing any dirt or residue. For more thorough cleaning, dampen the cloth with distilled water, but avoid getting moisture inside the meter. Never use alcohol, harsh chemicals, or abrasive materials, as they may damage the screen or internal components. Regular cleaning prevents bacterial growth and ensures reliable performance. Avoid touching the test strip port or display screen to minimize contamination. Cleaning should be done weekly or whenever visible debris is noticed. Proper care ensures your meter remains accurate and functions optimally for daily blood glucose monitoring.
Storing the Meter and Test Strips
Proper storage of the ReliOn Prime Glucose Meter and test strips is crucial for maintaining their accuracy and longevity. Store the meter in a cool, dry place, away from direct sunlight and moisture. Avoid exposing it to extreme temperatures, as this may affect its performance. Test strips should be kept in their original container, sealed tightly to prevent moisture exposure, and used before the expiration date. Do not store strips in the meter or in humid environments. Keep both the meter and test strips out of reach of children. Always store the meter in its protective case when not in use to prevent damage. Proper storage ensures your ReliOn Prime Glucose Meter remains reliable for accurate blood glucose monitoring.
Battery Replacement and Maintenance
Your ReliOn Prime Glucose Meter uses a CR2032 lithium battery, which is pre-installed and ready for use. When the battery level is low, the meter will display a low battery symbol. To replace the battery, open the battery compartment located on the back of the meter. Remove the old battery and insert a new CR2032 battery, ensuring the + sign faces upward. Close the compartment and turn the meter on to verify it is functioning properly. Avoid using damaged or expired batteries, as this may affect performance. Store spare batteries in a cool, dry place and keep them out of reach of children. Proper battery maintenance ensures accurate and reliable glucose monitoring.
Troubleshooting Common Issues
Identify and resolve issues like error messages, inaccurate readings, or syncing problems. Check meter settings, test strip expiration, and ensure proper sample application. Consult the manual or contact support for assistance.
Understanding Error Messages
The ReliOn Prime Glucose Meter displays specific error messages to help identify issues. For instance, “LO” indicates a blood glucose level below the meter’s detectable range, suggesting severe hypoglycemia. Other errors may include “E1” or “E2,” which typically signal issues with the test strip or meter functionality. If the meter shows an error, refer to the user manual for detailed explanations and troubleshooting steps. Common causes include expired or damaged test strips, incorrect sample application, or improper meter calibration. Addressing these issues promptly ensures accurate readings and optimal glucose monitoring. Always consult the manual or contact customer support for unresolved problems.
Resolving Inaccurate Readings
If your ReliOn Prime Glucose Meter shows inconsistent or inaccurate results, several steps can help resolve the issue. First, ensure the test strip is properly inserted and not expired or damaged. Verify that the meter is correctly calibrated with the test strip batch. Perform a control test using ReliOn Prime Control Solutions to confirm the meter’s accuracy. If issues persist, check for environmental factors like extreme temperatures or humidity. Clean the meter’s strip port and ensure the battery is functioning. If the problem remains unresolved, restart the meter or consult the user manual for further troubleshooting. For persistent inaccuracies, contact customer support for assistance or replacement.
What to Do if the Meter Displays “LO”
If your ReliOn Prime Glucose Meter displays “LO,” it indicates that your blood glucose level is below the meter’s detectable range. This could mean your blood sugar is extremely low. First, retest with a new test strip to confirm the reading. Ensure the strip is undamaged and properly inserted. If the “LO” error persists, check the meter’s calibration and verify that it is set up correctly. Perform a control test using ReliOn Prime Control Solutions to ensure the meter is functioning accurately. If the issue continues, consult the user manual or contact customer support for assistance. Always prioritize your health and consult a healthcare professional if you experience symptoms of severe hypoglycemia.
Additional Features and Functions
The ReliOn Prime Glucose Meter offers memory recall, data tracking, and customizable reminders. It also features alerts and syncing capabilities with Glooko for enhanced management.
Memory Recall and Data Tracking
The ReliOn Prime Glucose Meter features a built-in memory that stores up to 250 test results, allowing users to track their blood glucose levels over time. Each reading is accompanied by the date and time, making it easier to monitor trends and patterns. This feature is particularly useful for identifying fluctuations in blood sugar levels and sharing detailed data with healthcare providers. The meter also supports data recall, enabling users to review past results directly on the device. Additionally, the memory function helps in maintaining a comprehensive record of glucose levels, which is essential for effective diabetes management. This tool empowers users to make informed decisions about their health and treatment plans.
Setting Reminders and Alerts
Setting reminders and alerts on the ReliOn Prime Glucose Meter helps maintain consistent blood glucose monitoring. Users can program the meter to remind them to test at specific times, such as before meals or bedtime. The process typically involves navigating through the device’s menu, selecting the reminder option, and choosing the desired times. The meter can store multiple reminders, ensuring that users never miss a testing schedule. Alerts are usually auditory or visual cues, such as beeps, to notify the user when it’s time to test. This feature enhances adherence to a testing routine, which is vital for effective diabetes management. Customization options may vary, but the primary goal is to provide timely and reliable notifications to promote better health outcomes. Regular use of these reminders can lead to improved blood sugar control and overall well-being for individuals with diabetes.
Syncing with Glooko for Data Management
Syncing the ReliOn Prime Glucose Meter with Glooko enables seamless data management and tracking of blood glucose levels. Glooko is a digital platform designed to store and analyze health data, providing users with a comprehensive overview of their diabetes management. To sync, ensure the meter’s time and date are set correctly, as incorrect settings can cause synchronization issues. The ReliOn Prime meter can store up to 250 test results, which can then be transferred to Glooko for long-term tracking and trend analysis. This feature is particularly useful for sharing data with healthcare providers, facilitating better-informed decisions. Regular syncing helps maintain accurate records and supports effective diabetes care.
Using Test Strips and Control Solutions
Test strips are essential for glucose testing. Always use ReliOn Prime strips for accuracy. Control solutions verify meter performance. Proper handling and storage ensure reliability.
ReliOn Prime Test Strips: Usage and Storage
ReliOn Prime test strips are designed for accurate blood glucose monitoring. To use, insert the strip into the meter, ensuring it clicks into place. Gently touch the test area to a blood droplet. Store strips in their original container, away from moisture and extreme temperatures. Avoid opening strips unless ready to use, as exposure to air can affect accuracy. Discard any strips past their expiration date. Proper storage ensures reliability and precise readings. Always handle strips by the edges to prevent contamination. For best results, use ReliOn Prime strips exclusively with your meter. Follow all instructions for optimal performance and accurate glucose monitoring.
Importance of Control Solutions
Control solutions are essential for verifying the accuracy of your ReliOn Prime Glucose Meter and test strips. They contain known glucose levels, allowing you to confirm that your meter and strips are functioning correctly. Regular use of control solutions ensures reliable test results and helps detect any potential issues with your testing supplies. Always use control solutions before using a new vial of test strips, if you suspect inaccurate readings, or after cleaning the meter. This step is crucial for maintaining accurate blood glucose monitoring and ensuring proper diabetes management. By incorporating control solutions into your routine, you can trust the reliability of your glucose readings and make informed decisions about your health.
Performing a Control Test
To ensure the accuracy of your ReliOn Prime Glucose Meter, perform a control test using ReliOn Premier Control Solutions. These solutions are available in two levels and are specifically designed for the ReliOn Prime system. Open the control solution vial and dip the test strip into it, ensuring the strip is fully saturated. Insert the strip into the meter and wait for the result. The meter should display a reading within the expected range for the control solution level used. If the result is outside this range, refer to the user manual for troubleshooting steps or contact customer support. Regular control testing helps verify the performance of your meter and test strips, ensuring reliable blood glucose monitoring and accurate health decisions.

User Manual Specifications
The ReliOn Prime Glucose Meter Manual is available in English and Spanish, spanning 54 pages with clear, legible text and a sturdy binding for durability and easy navigation.
What’s Included in the User Manual
The ReliOn Prime Glucose Meter Manual includes detailed instructions for setup, testing, and maintenance. It covers time and date settings, test strip usage, and troubleshooting. The manual is available in both English and Spanish, ensuring accessibility for a broader audience. It also provides guidance on syncing data with Glooko for advanced management. Additionally, the manual includes sections on battery replacement, error messages, and control solutions. The document is 54 pages long, with clear, legible text and a sturdy binding for durability. It serves as a comprehensive guide for users to maximize the meter’s functionality and accuracy. The manual is available as a free PDF download from trusted sources like Manuals.Plus.
Navigating the User Manual
The ReliOn Prime Glucose Meter Manual is organized into clear, numbered sections for easy navigation; Each chapter is labeled with headings and subheadings, making it simple to locate specific information. Users can quickly find details on setup, testing, and troubleshooting by referencing the table of contents. The manual also includes an index for fast lookup of key terms. Instructions are written in plain language, with step-by-step guides and visual aids to enhance understanding. The document is available in both English and Spanish, ensuring accessibility for a diverse user base. By following the logical flow of the manual, users can efficiently master the operation of their ReliOn Prime Glucose Meter.
Language Options: English and Spanish
The ReliOn Prime Glucose Meter Manual is conveniently available in both English and Spanish, ensuring accessibility for a diverse range of users. Both versions provide identical content, with clear instructions and detailed information to help users understand and operate their glucose meter effectively. The manual is designed to be user-friendly, with straightforward language and organized sections for easy navigation. Whether you prefer English or Spanish, the comprehensive guide ensures that you can confidently manage your blood glucose monitoring. This bilingual feature makes the ReliOn Prime Glucose Meter Manual a valuable resource for individuals who speak either language, promoting better diabetes care and management across different communities.
Thank you for choosing the ReliOn Prime Glucose Meter. This manual has guided you through setup, usage, and maintenance. Accurate blood glucose monitoring is now at your fingertips.
Final Tips for Effective Use
- Always use ReliOn Prime test strips and control solutions for accurate results.
- Regularly clean the meter to prevent contamination and ensure reliability.
- Review your test results in the memory recall feature to track progress.
- Sync your data with Glooko for comprehensive diabetes management.
- Set reminders to stay consistent with blood glucose testing schedules.
- Consult the user manual for troubleshooting or clarification on any feature.
- Ensure the meter is properly initialized before first use.
- Keep the device away from extreme temperatures and moisture.
- Replace the battery promptly when low to avoid data loss.
The ReliOn Prime Glucose Meter is a reliable and affordable solution for blood glucose monitoring. It offers a compact design, quick testing with small blood samples, and a 250-test memory for tracking progress. The meter supports both 12-hour and 24-hour time formats and provides accurate results for effective diabetes management. Additionally, it includes features like data syncing with Glooko for comprehensive health tracking. The user manual is available in English and Spanish, ensuring accessibility for a broader audience. With its intuitive interface and essential functions, the ReliOn Prime is an excellent choice for those seeking a cost-effective and user-friendly glucose monitoring system.